PXE(Preboot执行环境)服务器允许通过网络无人值守或自动操作系统安装。PXE的主要好处是我们不需要任何可启动驱动器来引导OS(操作系统),我们不需要刻录任何ISO文件 进入DVD或USB设备。
一旦配置了PXE服务器,我们就可以在网络上同时安装数百个系统。它适用于客户端 – 服务器架构,以通过PXE选项启动客户端的操作系统安装。
在本文中,我将在CentOS 7.x上设置PXE服务器,然后将尝试使用PXE引导在客户端上安装OS。
步骤 1 :为PXE设置安装所需的软件包
yum install dhcp tftp tftp-server syslinux vsftpd xinetd步骤 2 :为PXE配置DHCP服务器
DHCP服务器的示例配置文件在“/usr/share/doc/dhcp*/dhcpd.conf.example“
DHCP的配置文件是在“/etc/dhcp/dhcpd.conf”
将以下行复制到文件“/etc/dhcp/dhcpd.conf”中,按照您的环境替换IP子网和其他详细信息。
#
# DHCP Server Configuration file.
#   see /usr/share/doc/dhcp*/dhcpd.conf.example
#   see dhcpd.conf(5) man page
#
ddns-update-style interim;
ignore client-updates;
authoritative;
allow booting;
allow bootp;
allow unknown-clients;

# internal subnet for my DHCP Server
subnet 192.168.8.0 netmask 255.255.255.0 {
range 192.168.8.111 192.168.8.115;
option domain-name-servers 8.8.8.8;
option domain-name "pxe.example.com";
option routers 192.168.8.1;
option broadcast-address 192.168.8.255; #not important
default-lease-time 600;
max-lease-time 7200;

# IP of PXE Server
next-server 192.168.8.32;
filename "pxelinux.0";
}
步骤 3 :编辑和配置TFTP服务器(/etc/xinetd.d/tftp)
TFTP(琐碎的文件传输协议)用于将文件从数据服务器转移到其客户端,而无需任何身份验证。
在PXE服务器设置的情况下,TFTP用于引导加载。
要配置TFTP服务器,请编辑其配置文件‘/etc/xinetd.d/tftp’,将参数“disable = yes”更改为“disable =no”并留下其他参数。
[root@localhost ~]# vi /etc/xinetd.d/tftp
service tftp
{
 socket_type = dgram
 protocol    = udp
 wait        = yes
 user        = root
 server      = /usr/sbin/in.tftpd
 server_args = -s /var/lib/tftpboot
 disable     = no
 per_source  = 11
 cps         = 100 2
 flags       = IPv4
}
所有网络引导相关文件将放在TFTP根目录“/ var/lib/tftpboot中”
[root@localhost ~]# cp -v /usr/share/syslinux/pxelinux.0 /var/lib/tftpboot
[root@localhost ~]# cp -v /usr/share/syslinux/menu.c32 /var/lib/tftpboot
[root@localhost ~]# cp -v /usr/share/syslinux/memdisk /var/lib/tftpboot
[root@localhost ~]# cp -v /usr/share/syslinux/mboot.c32 /var/lib/tftpboot
[root@localhost ~]# cp -v /usr/share/syslinux/chain.c32 /var/lib/tftpboot
[root@localhost ~]#
[root@localhost ~]# mkdir /var/lib/tftpboot/pxelinux.cfg
[root@localhost ~]# mkdir /var/lib/tftpboot/networkboot
[root@localhost ~]#
步骤 4 : 挂载 CentOS 7.x ISO文件并将其内容复制到本地FTP服务器
[root@localhost ~]# mount -o loop CentOS-7-x86_64-DVD-1908.iso /mnt/
mount: /dev/loop0 is write-protected, mounting read-only
[root@localhost ~]# cd /mnt/
[root@localhost mnt]# cp -av * /var/ftp/pub/将内核文件(vmlimz)和initrd文件从已挂载的ISO文件复制到‘/var/lib/tftpboot/networkboot /’
[root@localhost ~]# cp /mnt/images/pxeboot/vmlinuz /var/lib/tftpboot/networkboot/
[root@localhost ~]# cp /mnt/images/pxeboot/initrd.img /var/lib/tftpboot/networkboot/
[root@localhost ~]#现在,您可以使用‘umount’命令卸载ISO文件
[root@localhost ~]# umount /mnt/
[root@localhost ~]#
步骤 5 :创建KickStart和PXE菜单文件
在创建kickstart文件之前,让我们首先在加密的字符串中创建根密码,因为我们将在KickStart文件中使用该加密密码字符串。
[root@localhost ~]# openssl passwd -1 123456
$1$hju1mj7b$DQrkSvxxVg000DG8Ckk531
[root@localhost ~]#系统默认kickstart文件位于/root下面,名称为“anaconda-ks.cfg”。 我们将在文件夹/var/ftp/pub下创建一个新的kickstart,名称为‘centos7.cfg’。
将以下内容复制到新的kickstart文件中。 请根据您的需求修改kickstart文件。
#platform=x86, AMD64, or Intel EM64T
#version=DEVEL
# Firewall configuration
firewall --disabled
# Install OS instead of upgrade
install
# Use FTP installation media
url --url="ftp://192.168.8.32/pub/"
# Root password
rootpw --iscrypted $1$hju1mj7b$DQrkSvxxVg000DG8Ckk531
# System authorization information
auth useshadow passalgo=sha512
# Use graphical install
graphical
firstboot disable
# System keyboard
keyboard us
# System language
lang en_US
# SELinux configuration
selinux disabled
# Installation logging level
logging level=info
# System timezone
timezone Europe/Amsterdam
# System bootloader configuration
bootloader location=mbr
clearpart --all --initlabel
part swap --asprimary --fstype="swap" --size=1024
part /boot --fstype xfs --size=300
part pv.01 --size=1 --grow
volgroup root_vg01 pv.01
logvol / --fstype xfs --name=lv_01 --vgname=root_vg01 --size=1 --grow
%packages
@^minimal
@core
wget
net-tools
%end
%post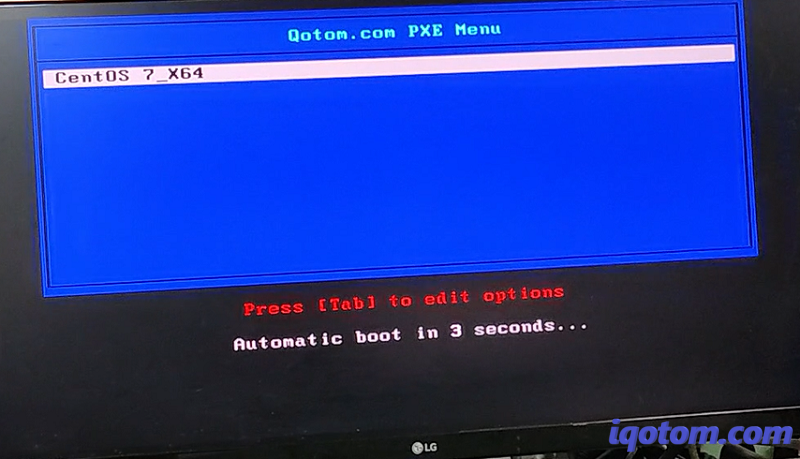
%end创建PXE菜单文件/var/lib/tftpboot/pxelinux.cfg/default,将以下内容复制到PXE菜单文件中。
default menu.c32
prompt 0
timeout 30
MENU TITLE Qotom.com PXE Menu
LABEL centos7_x64
MENU LABEL CentOS 7_X64
KERNEL /networkboot/vmlinuz
APPEND initrd=/networkboot/initrd.img inst.repo=ftp://192.168.8.32/pub ks=ftp://192.168.8.32/pub/centos7.cfg
步骤 6 :启动并启用XinetD,DHCP和VSFTPD服务
[root@localhost ~]# systemctl start xinetd
[root@localhost ~]# systemctl enable xinetd
[root@localhost ~]# systemctl start dhcpd.service
[root@localhost ~]# systemctl enable dhcpd.service
Created symlink from /etc/systemd/system/multi-user.target.wants/dhcpd.service to /usr/lib/systemd/system/dhcpd.service.
[root@localhost ~]#
[root@localhost ~]# systemctl start vsftpd
[root@localhost ~]# systemctl enable vsftpd
Created symlink from /etc/systemd/system/multi-user.target.wants/vsftpd.service to /usr/lib/systemd/system/vsftpd.service.
[root@localhost ~]#
如果启用SELinux,则设置FTP服务器的以下SELinux规则。
[root@localhost ~]# setsebool -P allow_ftpd_full_access 1
[root@localhost ~]#
使用以下防火墙-cmd命令打开OS防火墙中的端口
[root@localhost ~]# firewall-cmd --add-service=ftp --permanent
success
[root@localhost ~]# firewall-cmd --add-service=dhcp --permanent
success
[root@localhost ~]# firewall-cmd --add-port=69/tcp --permanent
success
[root@localhost ~]# firewall-cmd --add-port=69/udp --permanent
success
[root@localhost ~]# firewall-cmd --add-port=4011/udp --permanent
success
[root@localhost ~]# firewall-cmd --reload
success
[root@localhost ~]#
到目前为止,PXE服务器安装和配置现在完成。完成后截图如下:
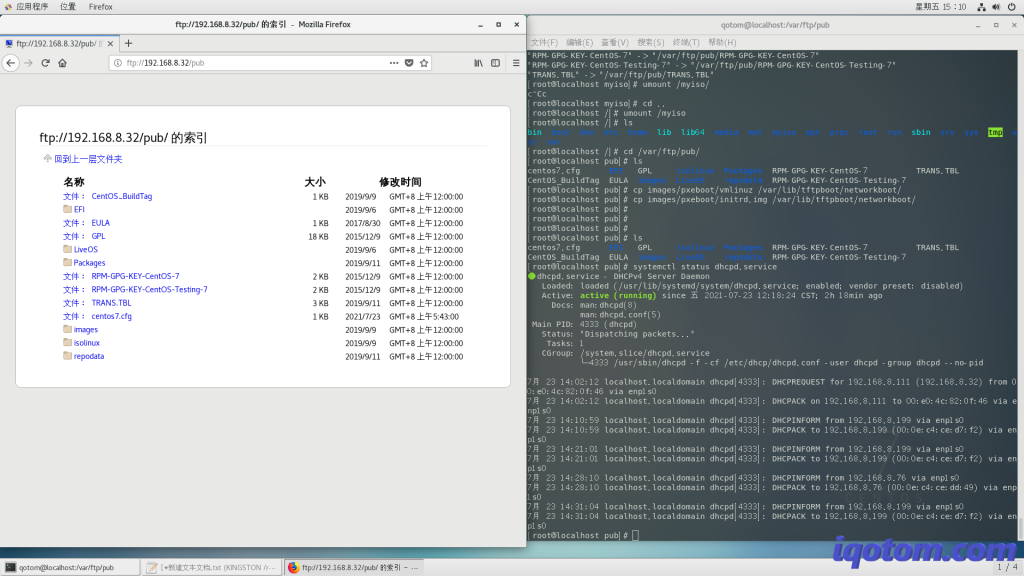
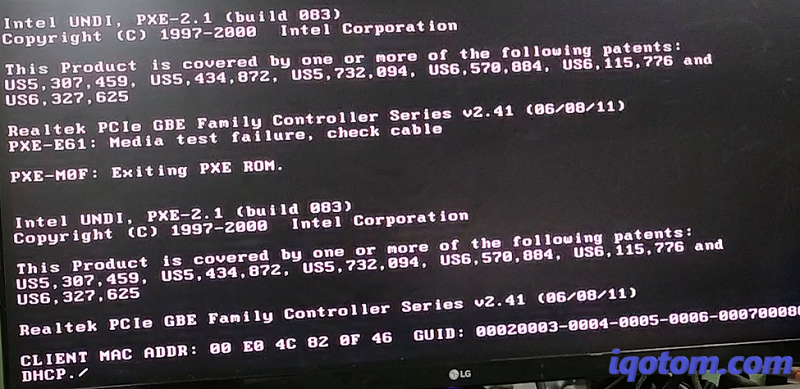
步骤 7 :使用PXE引导选项引导客户端
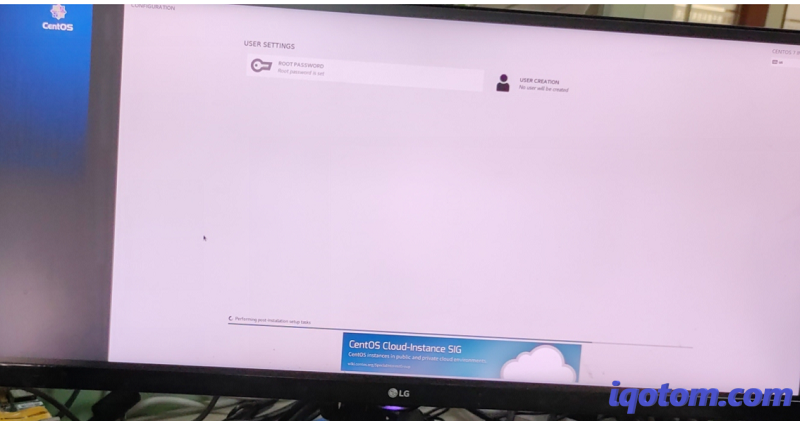
如上所述,安装会自动完成,root密码为之前设置的123456
参考文献: Configure PXE (Network Boot) installation Server on CentOS 7.x (linuxtechi.com)